You can store against each client any number of Role Codes. This allows for you to give attributes to what the client does for your organisation. A couple of examples regarding this might be Volunteer, Staff Member, Board Member etc.
Role Codes can also have sub-roles, which can be used for drilling down for specific types of roles. For example you can have sub-roles on Volunteering, which maybe is the individual areas the client volunteers as.
Setting up Role Codes
To set up role codes go to Setup > Clients > Roles

Upon loading you will see the role codes you have defined. To create a new role code click Add New Client Role
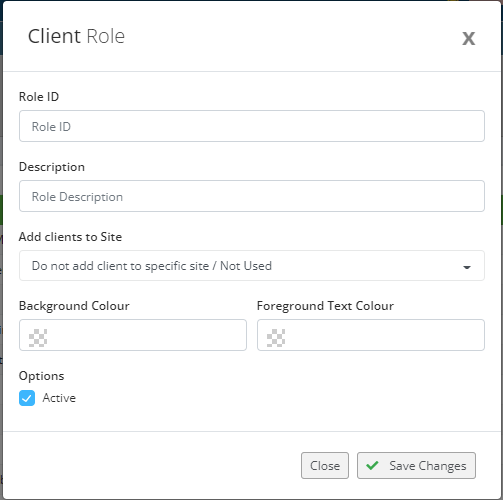
In this screen you can define the Role Code. In Role ID you can enter a small code to define the role. The Description is what will display on the client and any reporting.
Optionally, you can choose Add Clients to Site if you run multiple sites – then if you add this role code to a client, it will also add the client to the define site.
You can also choose to add a Background and Foreground (text) colour if you wish to colour code the role code. This is optional as well.
Ensure Active is ticket, and you will be able to then assign clients to that role. When you have filled in the required fields click Save Changes
There is a number of options available on the “…” menu for each role code which allows you to add icons, or create sub-roles, after you have created the role.
Assigning the Role to a Client
Go to the Client that you wish to attach the role to and click on the Roles link on the left hand side.
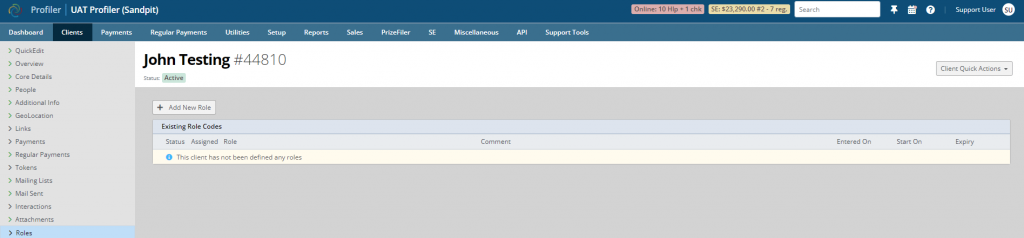
If the client has any roles you will see them listed here. You can click Add New Role
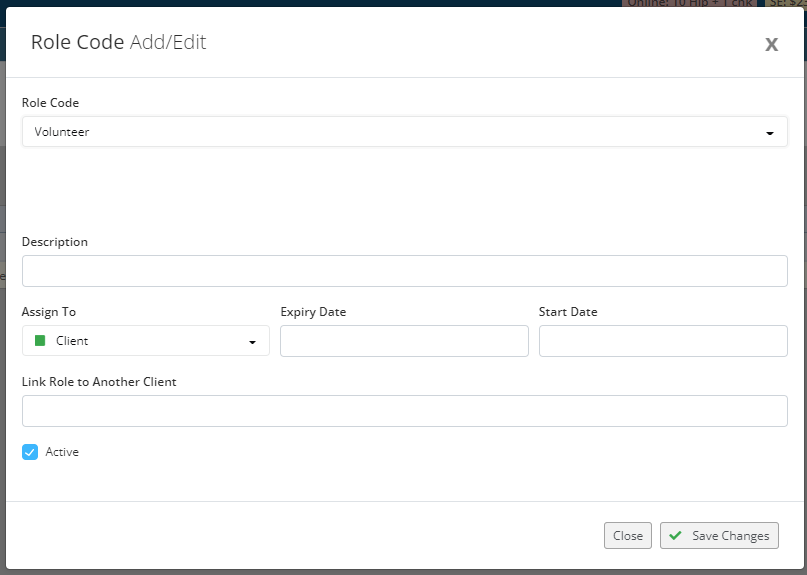
You can fill in a number of fields. The only field that is mandatory is the Role Code, the fields are as follows:
- Role Code – select from the list of role codes you have created (Step 1) that you wish to assign to the client.
- Sub-Role – if the Role Code you select has sub-roles, that field will appear and you can optionally select it.
- Description – if you wish to give a description to this client about this role, you can add this in here.
- Assign To – by default you are assigning the role to the client, but if the client contains multiple people, you can select this particular person from the drop-down. This is helpful if the role selected is for only 1 member of a dual-person client.
- Expiry Date – if the role expires after a period of time, you can put the date in here. By default it can be left blank.
- Start Date – if the role commenced on a particular date, you can select it here. By default being blank it will start from the current date.
- Link Role to Another Client – if this role relates to another client as well (ie. a business etc) you can select/type in the client ID here. By default it can be left blank.
- Active – ensure this is ticked to make the role active against the client. If you wish to enter historical data, you can untick this box, and it will show the role against the client, but as expired/inactive.
When finished click Save Changes and the role will be assigned to the client.
Quick Search by Role
If you wish to quickly find all clients with a particular role – you can do this at Client search screen.
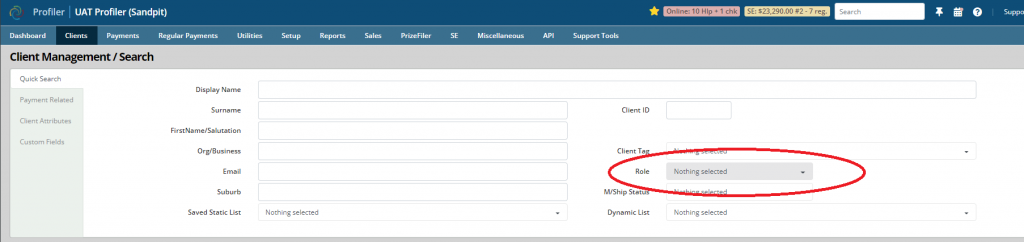
You can select the role (and optional sub-role) to search by from the client search screen as part of the normal search processes.