The Westpac PayWay (REST) gateway can be used for processing Credit Cards and Direct Debits with Profiler. The PayWay REST implementation does require a little bit of configuration before being used with Profiler and this article outlines the tasks required.
To set up the Payment Gateway go to Setup > Payments > Accounts + Payment Gateways
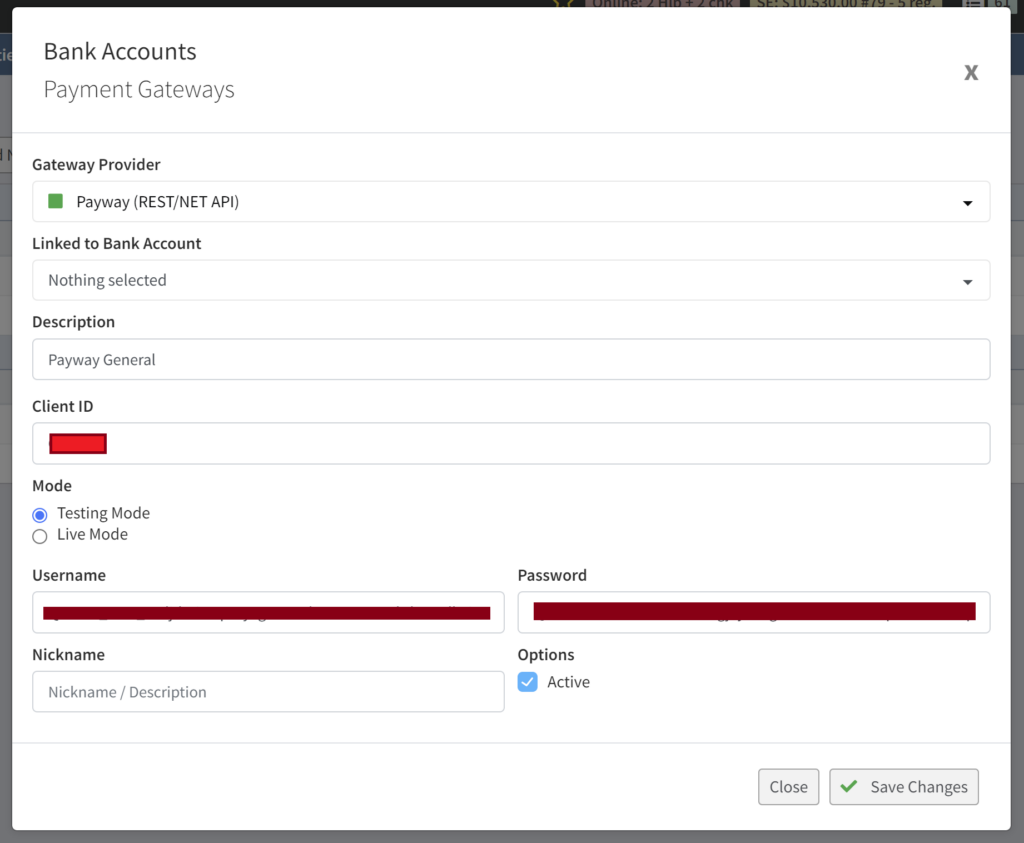
- From the Gateway Provider choose Payway (REST/NET API) and give it a Description
- You then need to add your client ID from Payway to it, which likely follows Q111111 or T111111 type/format of numbers
- Your mode should be Live Mode
- The Username and Password are the QPI Secret Key from Payway – you will need to create these two values from Payway. There is a PUBLIC key and a SECRET key – Profiler will need both. To find these keys log into Payway and go to the REST API Keys – you will need to copy and paste both the PUB and SEC keys into Profiler. The PUB key goes to the Username field and the SEC key goes to the Password field. You may need to create a new secret key within the Westpac Payway environment if it has expired or never been created.
- When you have added these details click Save Changes
Payway has the ability to deposit information into different merchant and bank accounts, so once created, click on the “…” menu for the new gateway you have created
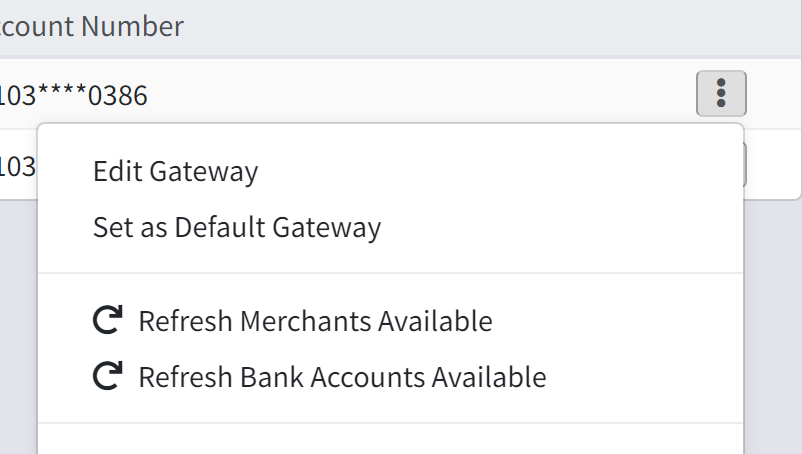
You can then choose both options for Refresh the Merchant Accounts and the Bank Accounts. Once you have refreshed the accounts available to you, click on the merchant account and the bank account you wish the payments using this gateway to go to.
This has then set up the account for use and payments made through it (Credit Card and Direct Debit) will then be sent to that merchant and bank account tied to your payway account.
Setup a Source Code to use the Gateway
You can then use the gateway on your source code(s) for payments. To assign it to go Setup > Payment > Source Codes and create or edit the source code you wish to use.
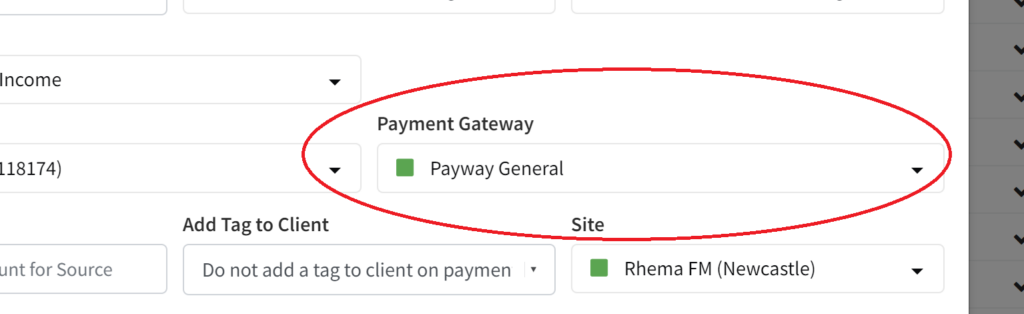
When editing the source code you can then assign it to use the Gateway you made in Step 1 – this will then route all payments on that source code via that payment gateway and ultimately end up within the associated bank account and merchant facility provided by Payway.