Profiler supports the Pinch Payments payment gateway for use within Profiler. This allows for one off and regular payments using this as a gateway provider.
To set up Pinch Payments you will need to get the relevant API details from the Pinch Payments portal – https://web.getpinch.com.au/
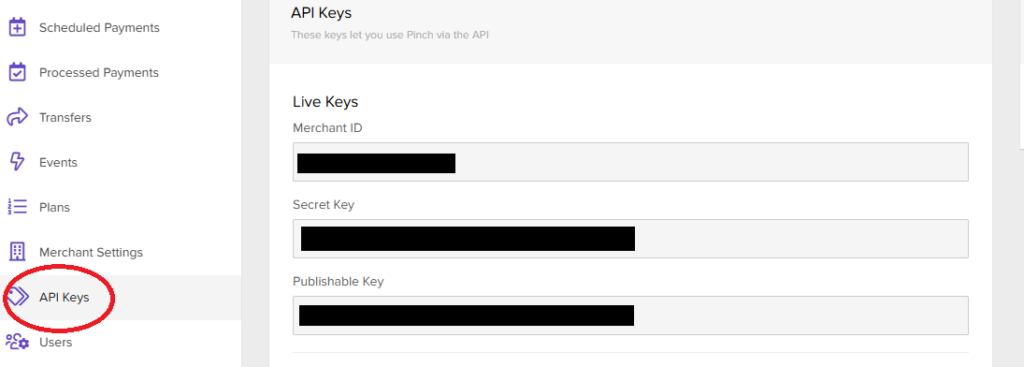
Navigate to the API keys section – these are the values you will need to put into Profiler
In Profiler go to Setup > Payments > Accounts + Gateways and click Add New Payment Gateway

The following fields will be needed in Profiler for this to work
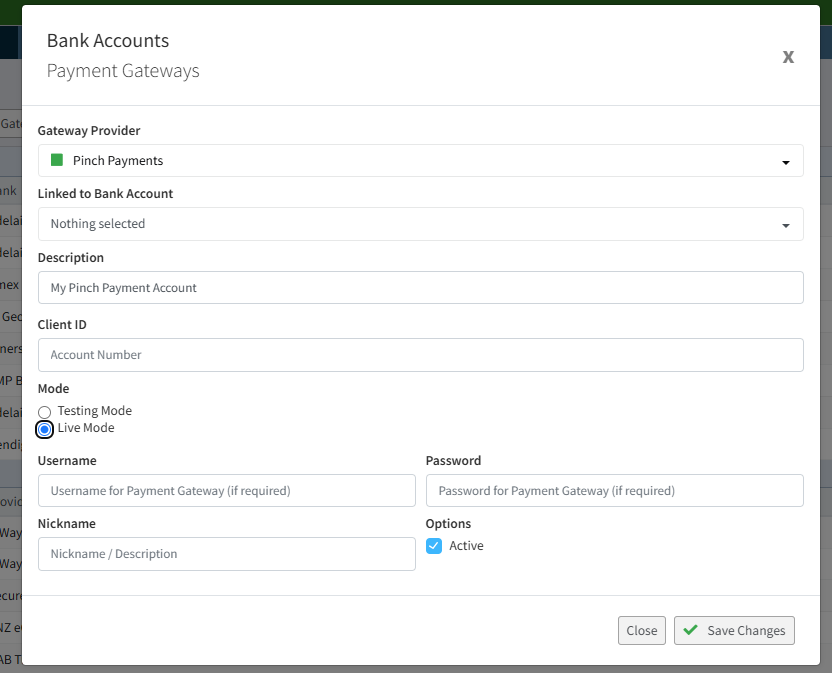
- Gateway Provider – select Pinch Payments
- Description – give a description so you can identify the payment gateway
- Client ID – put in the Merchant ID field from the Pinch Payments portal
- Mode = Live Mode
- Username – put in your Secret Key here from the Pinch Payments portal
- Password – put in your Publishable Key here from the Pinch Payments portal
Once these fields have been entered click Save Changes