We recommend for your organization to use an enterprise Single Sign On for access to Profiler. This could be Office 365 / Microsoft Azure or Google Apps etc.
Enabling Single Sign On
To enable SSO go to Setup > System Wide Settings

In the General Option sections – tick the required SSO provider for your system. When creating users in Profiler in Setup > User Management – the user email address must match to that as provided by your SSO provider.
When loading the Profiler sign in screen, the user will click the Login via Google or Login via Microsoft button on the login screen.
Making a User use SSO
If you wish an existing to user to be forced to log in via your enterprise SSO, in Setup > User Management and editing the required user, in the Status section, the tick box of User must use Single Sign On (SSO)
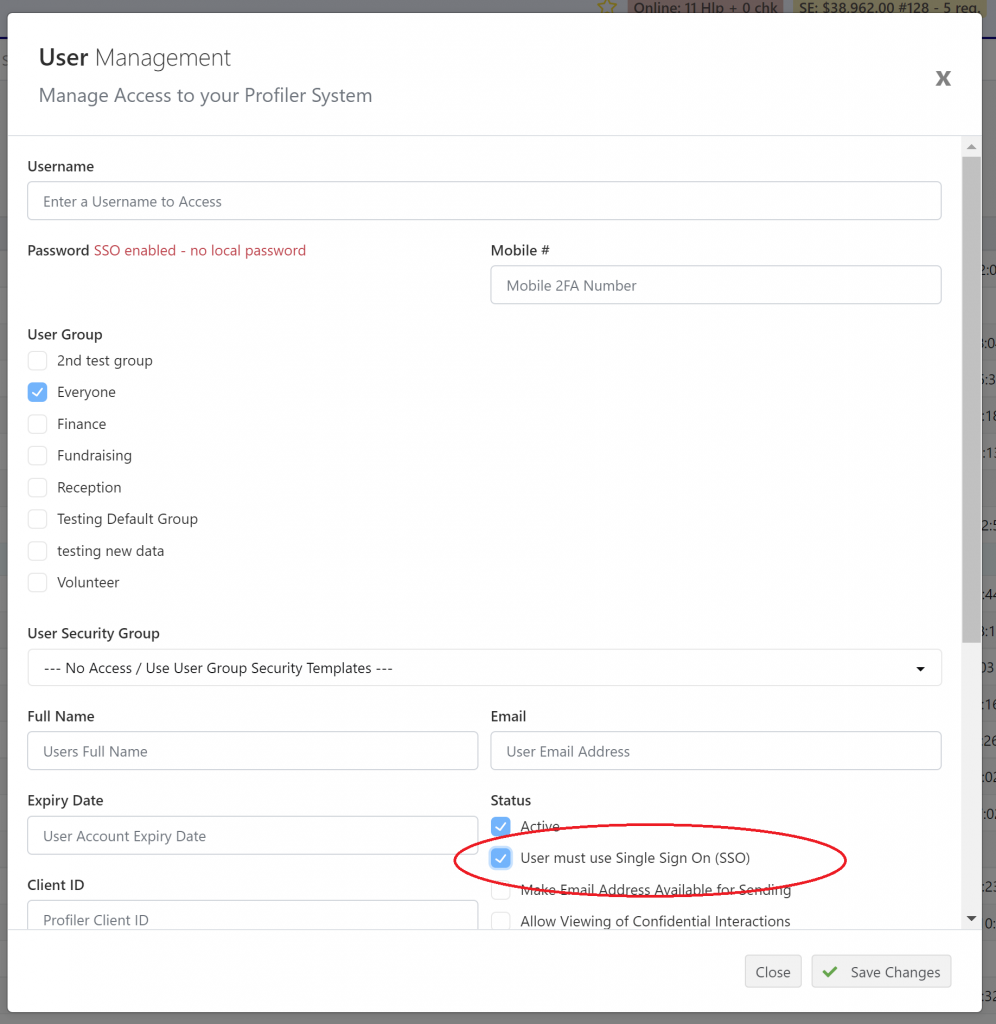
If enabled, the password field will disappear and you can choose Save Changes.
If a user logs in with their Profiler user name and they have SSO enabled, they will be directed to your SSO platform to sign in using that platform. They do not have a normal profiler password and cannot access it via those means – it must be via the SSO system.
Users with SSO enabled on their accounts have the text “sso” displayed in the 2Factor column when using Setup > User Management