A common requirement is to created a segmented mail-out, where you may select all clients on a particular Mailing List, but only wish to send to some of them. This article will step you through the process on created a segment of clients, from a master mailing list.
Building the Default List
From Reports > Mail-Out Wizard you can select the Mailing List(s) you wish to get the default list of clients from.
Simply tick the Mailing List you wish to get the clients from, and in the Delivery Method you can keep the defaults (this will NOT include clients who have the Never option set for the mailing list)

When ready Click Next Screen, and Profiler will go and retrieve all the clients who are on that mailing list.
On the next screen, you can then choose to restrict by your segmentation categories, however in this situation, we will leave the All Clients with the Mail Type as default

Click Continue
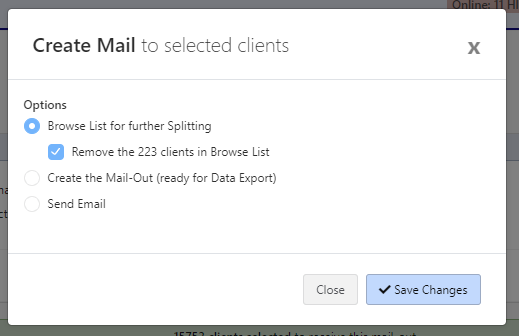
On the pop-up shown, choose the default option of putting these clients into Browse List for Further Splitting and also the option to Remove the X clients in the Browse List (this will remove any clients who were already there in the Browse List from previous work). Once selected click Save Changes
Browse List
The Browse List allows you to split your clients from the main mailing list into a mail-out or group of mailings based upon criteria. You can always go back to your browse list via Reports > Browse List
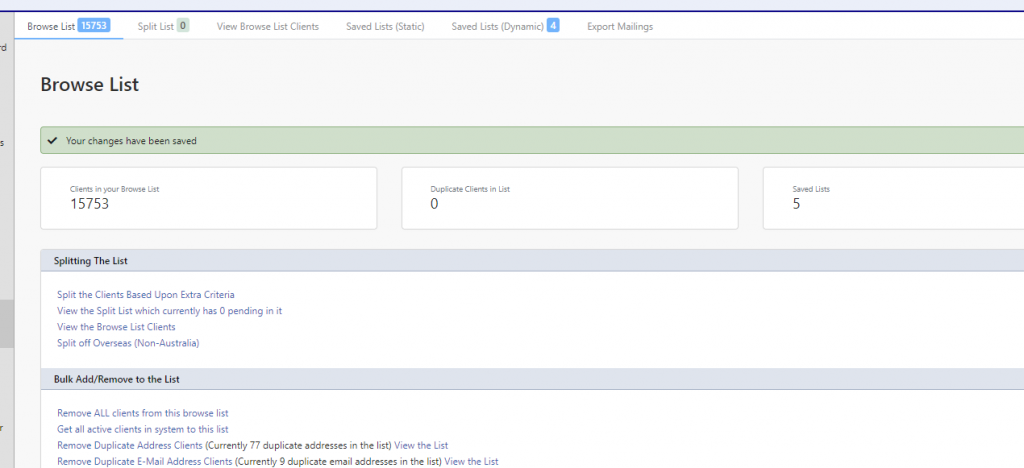
Your browse list will show a summary of the total number of clients in the list, and the important option in this is to use Split the Clients Based Upon Criteria
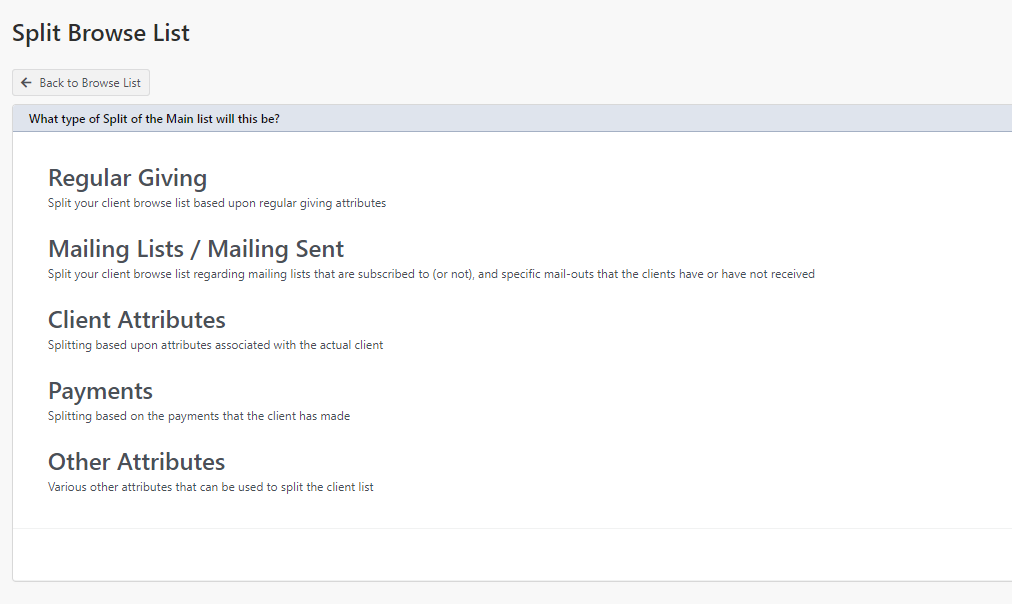
You can split the browse list clients based upon a number of different attributes (as shown above), in our example, we want to find all the clients who have made a payment in the last 2 years, so we will click Payments and a number of options regarding how to split by payment information will appear.
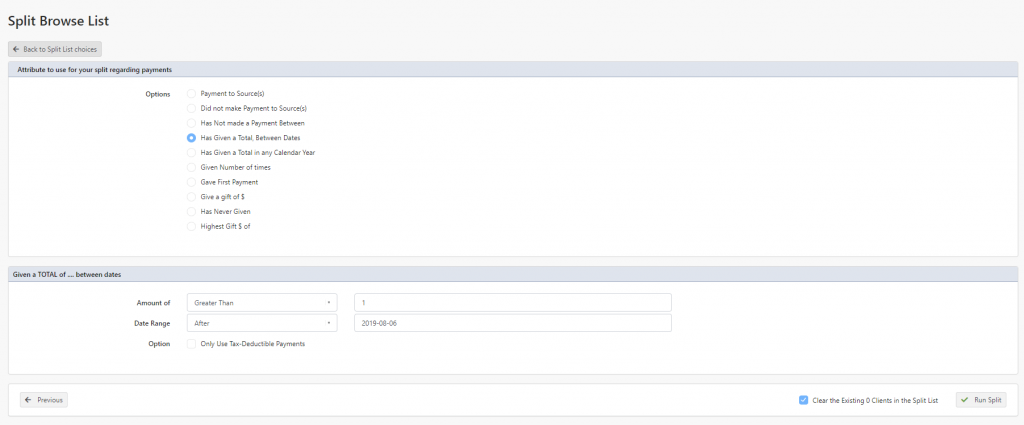
In our case, we will split by Has Given a Total Between Dates, and when selecting that, you can see another section will appear with the parameters.
In our example we will put Amount of and select Greater than and in the text field type 1 – this will get all payments of above $1, and in the Date Range we will select After and in the field, click on it, and from the date selector, go back 2 years.
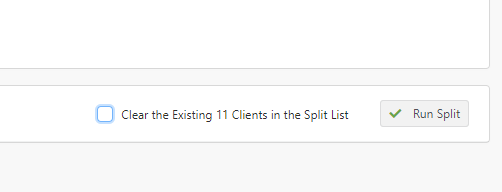
In the bottom right, we can keep ticked the Clear the Existing X Clients in the Split List – this will remove any clients that may have previously been split
When ready click Run Split

Profiler will then from the original clients in the mailing list that was put into the browse list, put all clients (in our example) that have made a payment of greater than $1 in the last 2 years. A number of options will then appear:
- Create a Mailout for this list of clients – will create a Mail Out / Mailing for these split clients, and remove them from the main browse list.
- Create a Mailchimp Segment of these clients – if using Mailchimp will create a segmented list of these clients ready for you to email from Mailchimp with a Campaign
- Remove these clients from the browse list – will remove these clients from the Browse List, leaving all the clients who did NOT match the criteria on the browse list
- Remove the main Browse List, and replace it with this list – will remove the main Browse List set of clients, and put these split clients back to the browse list (allowing further splitting etc)
- Save these Clients as a Saved Browse List – will save these clients as a browse list that you can recall later, and remove them from the main browse list
- Keep these clients in this Split List, remove them from main browse list – will keep the clients in this split list (allowing you to add more clients to the split list), but remove them from the main browse list as well
- Put these clients back into the browse list – this will ignore the split, and return the clients to the browse list
If selecting Create a Mailout for this list of clients, Create a Mailchimp Segment of these clients, or Save these Clients as a Saved Browse List a further popup will appear asking for information to complete this section.
Adding another Split to an Existing Split
After completing one split and choosing the Keep these clients in this Split List, remove them from main browse list, you can go back to Reports > Browse List and run a Split process again (like above) and when choosing the option before running the split ensure you un-tick the “Clear the Existing X clients in the Split List”
You can repeat the split as many times as you want, and can always return to this split off list of clients by going to Reports > Browse List and click Split List at the top navigation bar at the top of the screen
Exporting the Final Split List as Mail-Out
On either the Split List, or Main Browse list, when you have your group of clients, you can then choose the option to create a Mail-Out for these clients

You will then be asked for the Mail out Description which is the reason for the mail-out, and then select the Mail-Out Type (which usually is the Mailing List)