When using Gravity Forms, with WordPress, you will need to link up the gravity form fields to those in Profiler using the Profiler WordPress Plugin. This KB article will show you how to match up your form fields for a membership form.
Gravity Forms Side
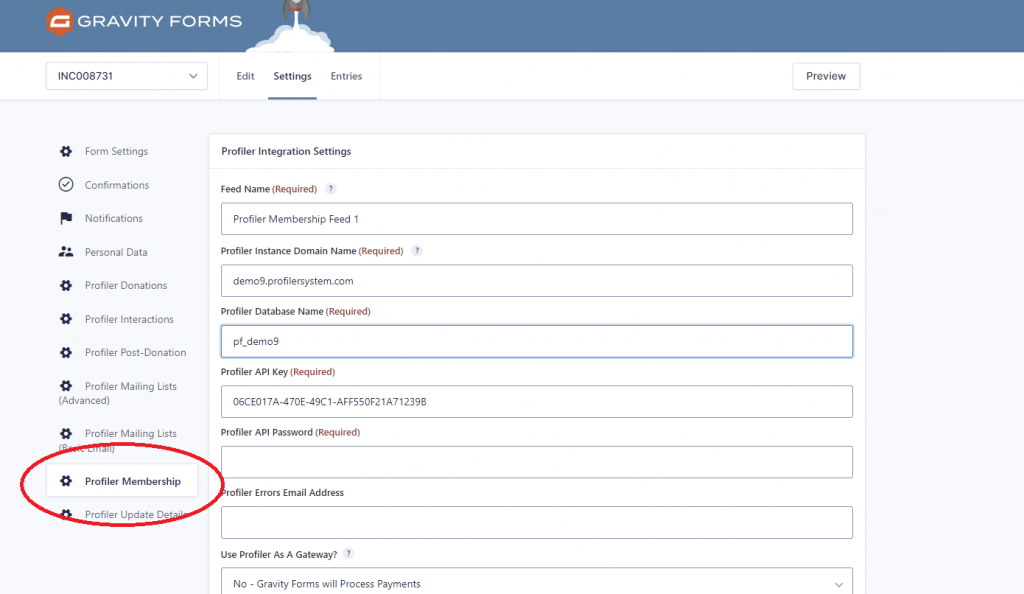
From Gravity Forms Settings for your form, select Profiler Membership on the left hand side. If there is no feed created in this section for this form, you need to Add A New One.
- Feed Name – this is just an internal name, and the default is usually okay.
- Profiler Instance Domain Name – this is the domain name you use to access Profiler. You DO NOT need to add the https:// or any other slashes. Example: demo.profilersystem.com
- Profiler Database Name – you can find this value on your Profiler system by clicking on the API module on the left hand side and putting the value from Profiler Database Name here
- Profiler API Key and API Password – as per above, you can find these values on the API module home screen in Profiler, and you can copy and paste these values directly to Gravity Forms.
- Profiler Errors Email Address – if for some reason the form cannot process, you should put an email address in here to be notified on any issues as clients are putting through the form.
- Use Profiler As a Gateway – in most cases this will be set to YES and Profiler will use the payment gateways as defined internally, linked to the source codes
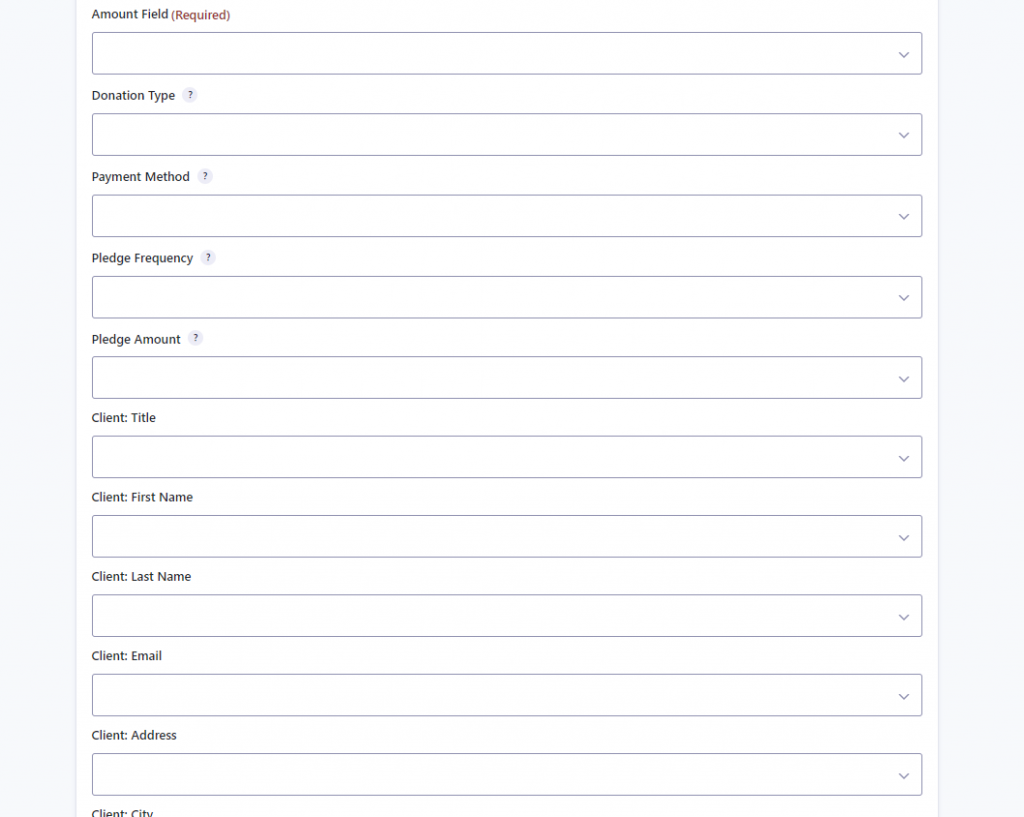
The next section is about mapping the fields in your Gravity Form.
- Amount Field – this is the field in your form that has the total amount of the transaction
- Donation Type – this value needs to be once (if it is a one off payment) or regular (if it is a subscription or regular gift), you can set this as a Hidden Field with the value of the above or a drop/down radio type button (if the form does multiple things). You need to select the field that holds this value, here.
- Payment Method – this needs to be a field that contains the value of creditcard, bankdebit or paypal if you are offering multiple payment types on your field. However, if it is just credit card payments, you can leave this field un-assigned, and Profiler will presume it is a credit card payment.
- Pledge Frequency – this needs to be a hidden field (or selectable field) which holds the value monthly or yearly to define how often it will be deducted/paid.
- Pledge Amount – this is the amount of the membership that is being passed
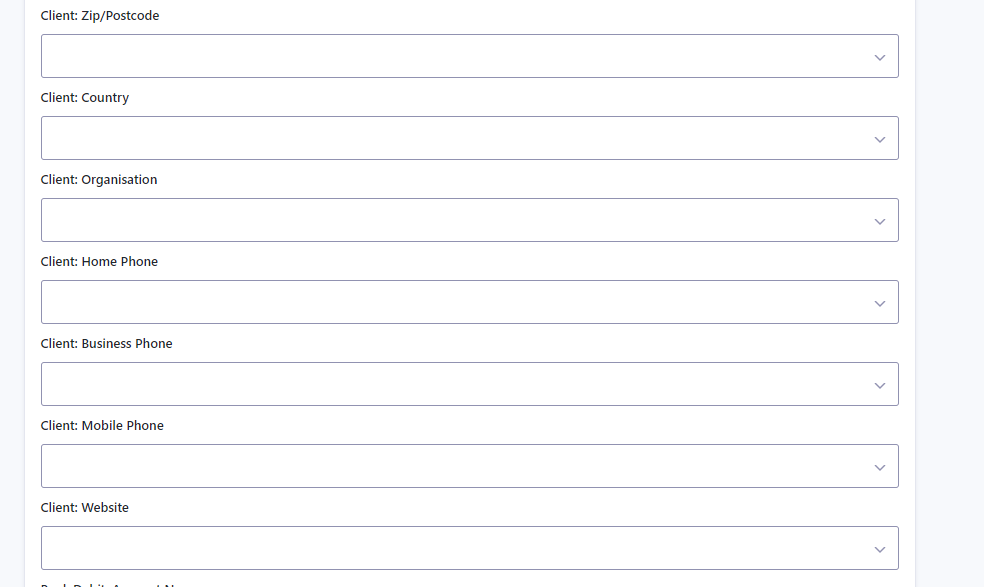
- Title, First Name, Last Name, Email, Address, City, Zip/Postcode, Country, Organisation, Home Phone, Business Phone, Mobile Phone, Website – are all the fields in Profiler that can optionally be mapped up to fields on your Gravity Form. At minimum you will need First Name, Last Name and Email Address
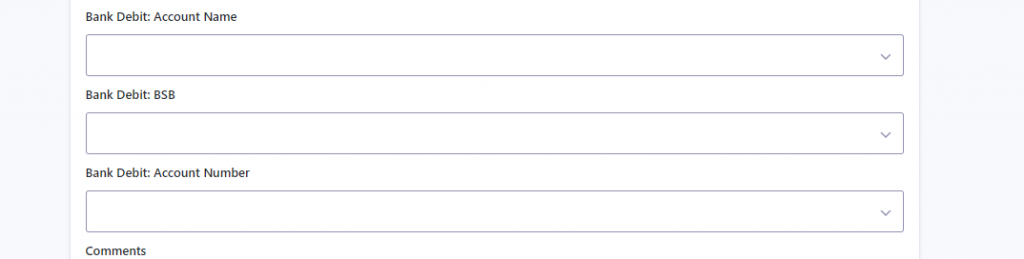
- If you are offering BSB/Direct Debit fields for your membership, you can match them up using the Bank Debit Account Name, Bank Debit BSB and Bank Debit Account Number fields. If you are not using Bank Debit, you can leave this blank
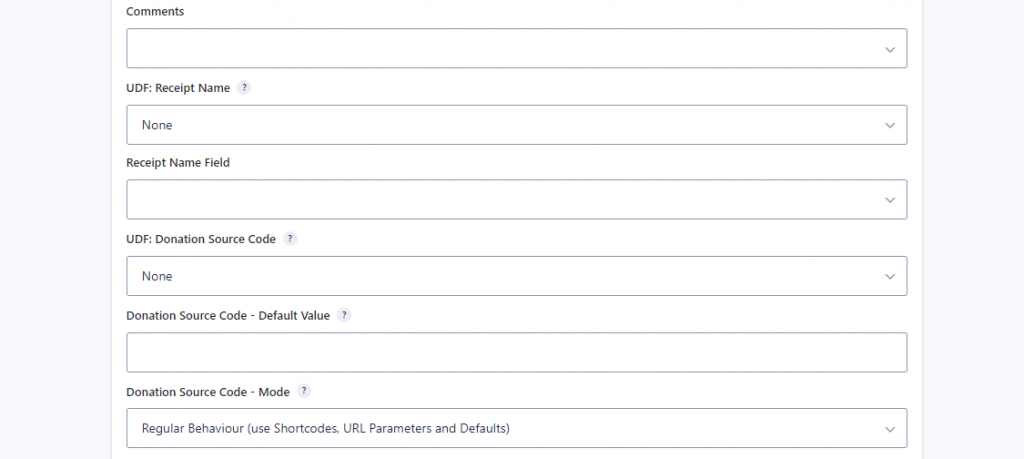
- Comments allows you to match a comment field on your form to the comments field for the payment/membership in Profiler.
- UDF Receipt Name if you wish to send a field for the receipt name to Profiler (ie. allow the client to specify their receipt name), you need to tell which User Defined Field (UDF) to expect this data on. Select a unique User Defined Field Number from the list and (and follow the instructions here to tell Profiler to map it to Receipt Name)
- Receipt Name Field – if using the above value, this is the field on Gravity Forms that is holding the Receipt Name field.
- UDF Source Code – this is the user defined field in Profiler that will store the Source Code for any donation/gift that is processed (you need to set that value in Profiler here too, to Donation Source Code) (the matched value in Profiler User Defined Fields as described here is Donation Source Code)
- Donation Source Code – Default Value – this is the source code you want for any Donation/Gift payments to go through this form.
- Donation Source Code – Mode – you can manually specify the source code from the list of drop-down, or leave it for Normal Behaviour (default)
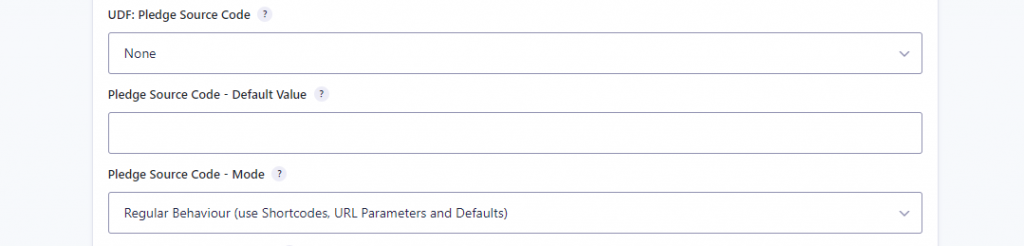
The Pledge Section is similar to the Payment/Gift section but in this situation regards the Membership.
- UDF Pledge Source Code is the user defined field in Profiler that you are storing the Membership Source Code (the matched value in Profiler User Defined Fields as described here is Pledge Source Code)
- Pledge Source Code – Default Value – this is the default source code as used for your Membership payments
- Pledge Source Code – Mode – you can manually specify the source code from the list of drop-down, or leave it for Normal Behaviour (default)
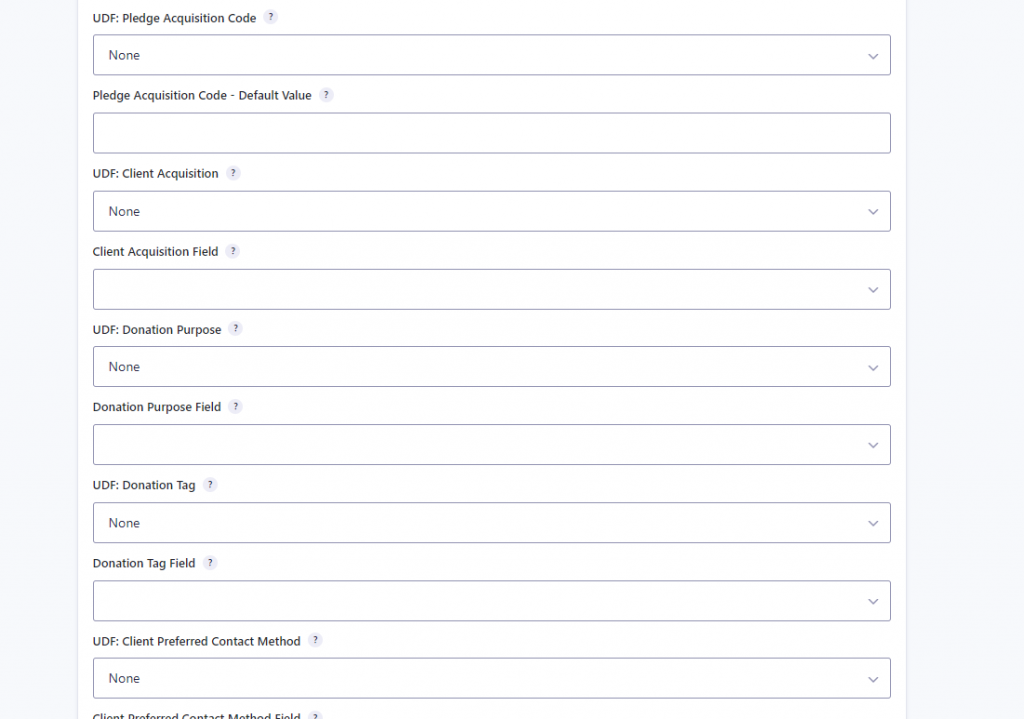
The section after is all in pairs for a User Defined Field and a matching field on your form which allows data to be passed to Profiler. This includes, Pledge (Membership) Acquired Reason, Client Acquired Reason (if the client is new), Donation Purpose, Donation Tag, Preferred Contact Method
These fields are all optional and can be set (or hidden fields) on your Gravity Form to pass this details across to Profiler, with all the UDF fields also needing definition in Profiler, for it to expect the information received – as discussed here
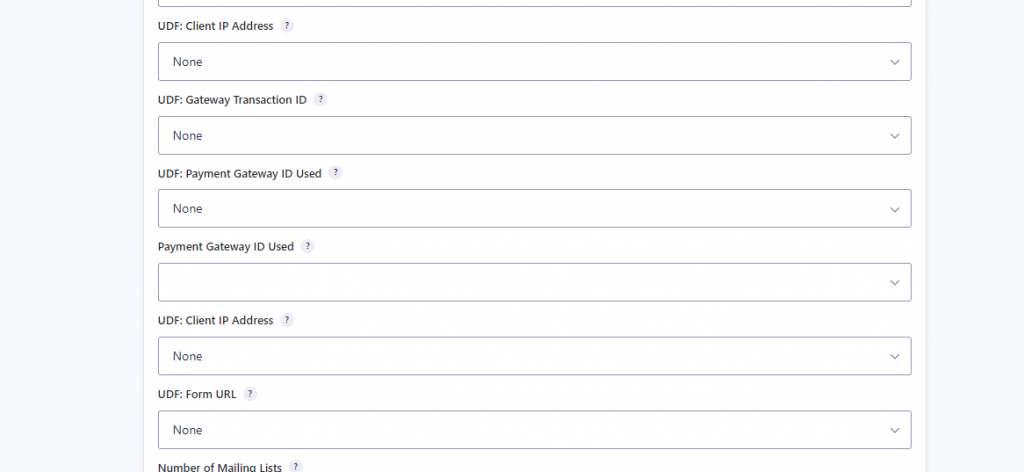
The next section does need definition in Profiler for User Defined Fields as explained here as this data is important in the transaction processing.
- UDF Client IP Address – needs to be set to store the IP address of the client that is making the payment. (The Value in Profiler is Client IP Address)
- UDF Gateway Transaction ID – needs to be the User Defined Field as set as Gateway Response in Profiler as explained here as this is the reference ID from the payment gateway reference number
- UDF Payment Gateway ID Used – (optional) will store a value in the User Defined Field of the Payment Gateway ID number (as set in Profiler that is used), this is helpful if you have multiple payment gateways. (The value in Profiler is Payment Gateway ID Used)
- UDF Form URL – will set the URL that was used for the payment, and will be defined in Profiler as Text – URL Call for the User Defined Field as explained here
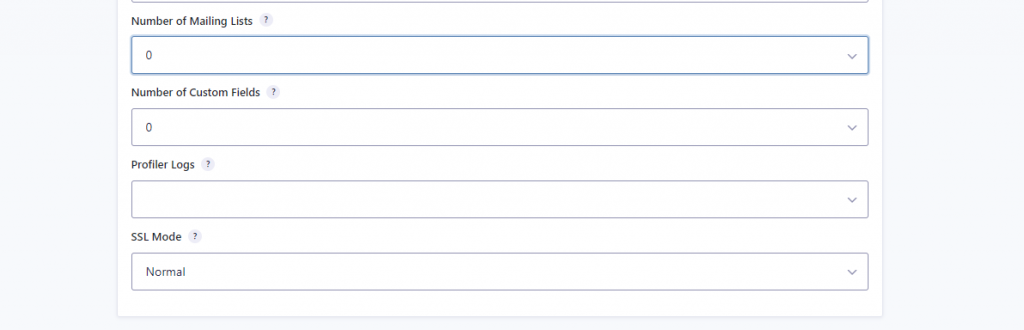
- Profiler Logs – needs to be a hidden field on your form where Profiler will store debug information, so Profiler Support can investigate as needed
- SSL Mode – in most cases this is set to Normal, however, if you have problems processing payments, one of the other two options might be needed
- Number of Mailing Lists – if you wish the client to subscribe to mailing lists as part of this transaction, you can set this value to the number of mailing lists you are bringing across, scroll to the bottom and hit Save, the page will then refresh allowing you to set those value maps
- Number of Custom Fields – this is the number of fields on your form that are custom data and that you want to bring across to Profiler. You can set this number, and scroll to the bottom and hit save, Profiler will then update the screen to allow the mapping (described below)
When you have finished all the settings, click Save Settings and the form will update with the values, ready for testing.
Custom Field Data
More and more we are finding that custom fields are needed to bring across to Profiler from web-forms. After you have defined your custom fields (Setup > Client > Custom Fields) and you on your Gravity Forms you have the fields ready to collect data, you need to tell the plugin/settings how to map the data across.

In your Gravity Form settings, set the Number of Custom Fields you will be bringing across from WordPress to Profiler (you can always go back and adjust this further) and scroll down and hit Save Changes

WordPress will then add 2 fields for every custom field. You need to tell it what Gravity Form Field has the data, and what Profiler User Defined Field (UDF) that value will be set in. Select the Field from the Gravity Forms Field dropdown list, and then select the UDF field.

Then go to Profiler and in the Setup > Integration > User Defined Fields and select the Custom field equivalent in Profiler. All the custom fields start with Custom: in the first part of the drop-down. The instructions for the field maps are here