This document outlines how to add your Profiler injest email automatically to your office 365 system, so outgoing (and incoming) emails (ie. sent to/from your corporate account) are automatically set as a BCC to Profiler for attaching into your clients.
Step 1 – Create contact (in Office 365 Admin)
- Go to Office 365 Admin > Exchange Admin > Recipients > Contacts
- Create a New Contact for your Profiler Injesting
- Set the email address as your injest email address
- You will use this contact in Step 2
Step 2 – Assign a Message Rule
- In Exchange Admin Centre go to Mail Flow > Rules
- Create a New Rule
- Give the Rule a Name – ie. Add Profiler to BCC messages outgoing
- If you only want to apply this to certain groups of people, in the Apply This Rule if – select the group, or member, or for all users
- In Do the Following – add BCC the message to – and then select the Contact you made in Step 1
- You should add an Except if rule and say The Sender if location and select Inside The Organisation – this will stop emails internally being sent going to the Profiler injest.
- When ready click Save and Profiler will start receiving and matching emails that have been sent from your Office 365 account
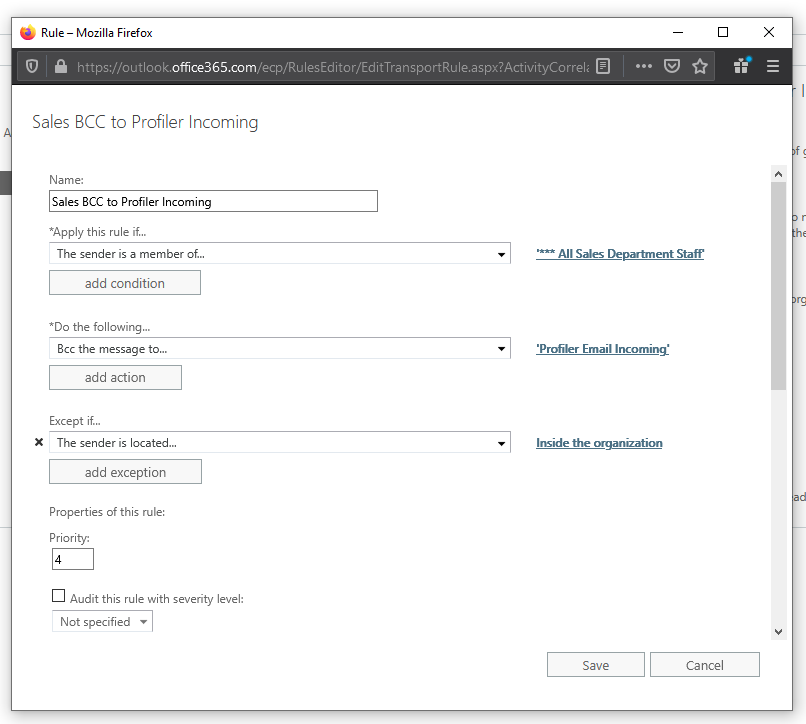
(example screenshot above)