When setting up a digital campaign in your Client > Sales you can display the media asset and handle impression and clicks directly from the Profiler AdServ system.
Uploading a Media Asset
To upload a media asset to be used as an advertising/banner go to the Client > Sales and then choose the Graphics Media tab.
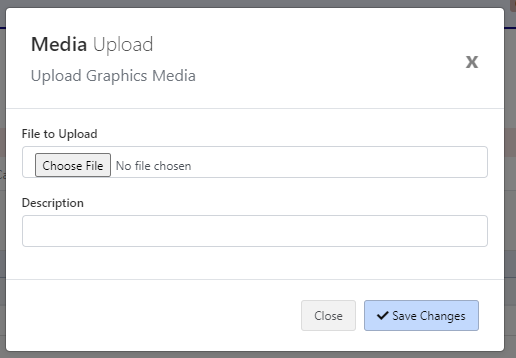
You can choose the option to upload the graphics file and the description of the file/advert you are uploading, and click Save Changes. This will upload the banner file ready for use on a Digital Campaign
Creating the Digital Campaign
From Clients > Sales and Digital Campaigns you will see all the previous digital campaigns for a client
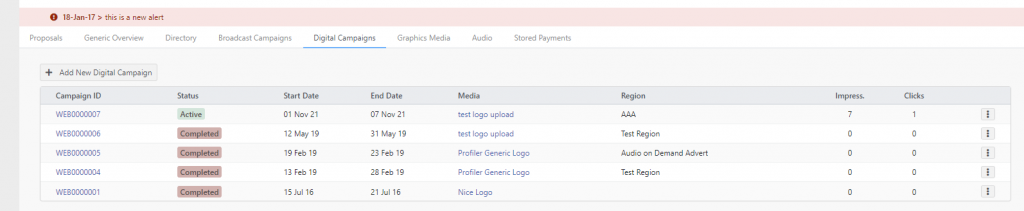
Any active campaigns will be listed at the top. To create a new Digital Campaign click on Add New Digital Campaign
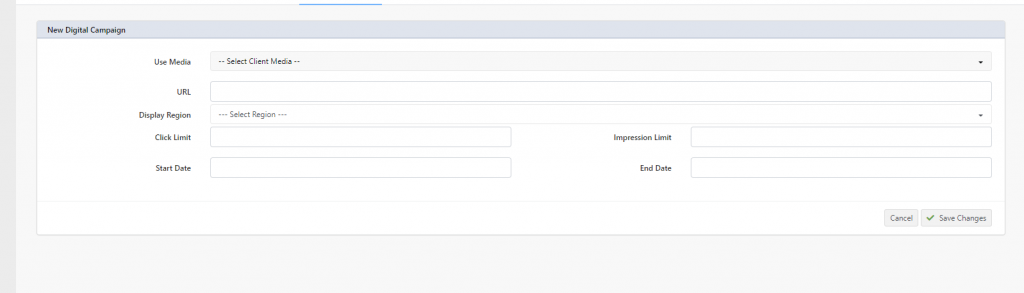
A number of fields can be assigned here – these are
- Use Media – which is the image/graphic file as previously uploaded into the Graphics Media as described above
- URL – is the URL when somebody is to click on the banner advert and where it is meant to go
- Display Region – where the banner advert and media is set to be displayed. You can define Display Regions here
- Click Limit – if blank there is no click limit, however, if set, the campaign will expire (not be shown) after it reaches the specific click limit
- Impression Limit – if blank there is no impression limit, however, if set, the campaign will expire (not be shown) after it reaches the specific impression (display) limit
- Start Date and End Date is the date range to run the Digital Campaign.
When you have finished setting up your campaign click Save Changes. This will then set up the digital campaign ready for use. You can also edit an existing campaign by clicking on the “…” menu on each of the listed digital campaigns.
WordPress/iFrame Code to Display
You can display your banner advert campaign on your WordPress (or other) website with a iframe.
The format of your iFrame is based around your Database Name and your Region Code.
- If you have a region code of “AAA” you would replace in the following code “AAA” with your region name
- You also replace the word database with the text you use to access Profiler – you can see this value from your normal Profiler Login screens.
iFrame Version
<iframe src="https://database.profilersystem.com/ProfilerAPI/AdServ/?Region=AAA"></iframe>If you are using the Legacy View in WordPress

You go to Text view and paste in the iFrame Version code as above for your region you wish to display on your page/post.
If you are using the Modern WordPress
You can add a new Block to your WordPress page and search for “Custom HTML”

And put the HTML Code Block onto the page where you require it and put in the iFrame code from above for your database and region you wish to display

In the Embed URL you can paste in the URL from the above, and you need the “non-iFrame” version of the code above, and click on Embed