If a source code is set up to always have a regular payment associated with it (Setup > Payments > Source Codes) and a payment (somehow) has been allocated with the source code and NOT a regular payment with it, you will need to associate that payment with the regular payment (or create a new one)
From Client > Payments choose the payment in question andclick on the “…” menu and click “Assign to Regular Payment” (this will only appear if the source code is set for this)
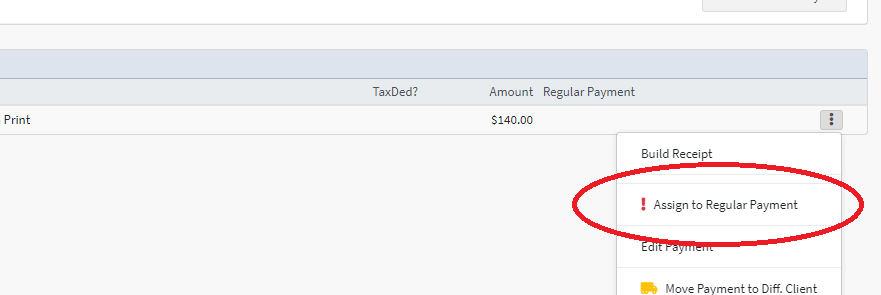
This will launch the “Post Payment Check System” (which is the same screen you see after entering a payment with the source code and don’t have a regular payment associated)
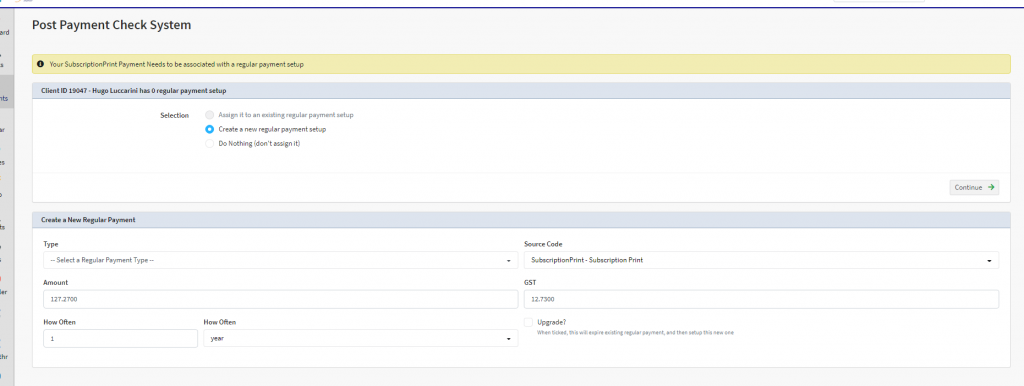
You can then see the options of:
- Assign to an existing regular payment (if the client has one already set up)
- Create a new regular payment setup
- Do Nothing at all (this will leave it as a one off gift)
If choosing to create a New Regular Payment, the bottom part of the screen allows you to define the details of the regular payment (taken from details of the payment), such as amount per time, the source code etc. You just need to ensure these details are correct (and add any Regular Type – if you use it) and click Continue
If choosing to assign to an existing regular payment, simply click on the existing regular payment and then click Continue to assign this payment to this regular payment.

The summary screen is then shown that the payment is now associated with a Regular Payment. You also have 1 final chance on this screen to set the Next Due Date, Regular Payment Type and the amount for each time it’s due.
When finished click Save Changes
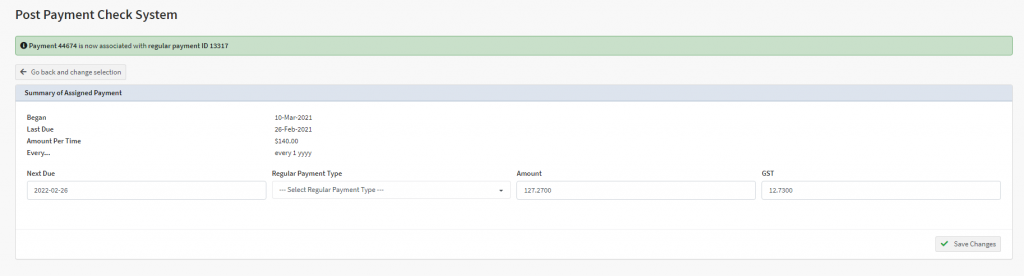
You will then see if you navigate to the Client > Payment screen that payment will be associated with the regular payment you just created.